
Build Stronger Glutes: Hip Thrusts at Home in 2026
MyFitnessCoach
August 28, 2026
You want stronger glutes but your closest gym is 20 minutes away and packed by 6 PM. Sound familiar? Hip thrusts at home have become the quiet fix for a lot of MFC users and in 2026, more people are training their glutes at home than inside commercial gyms. You don't need a squat rack, a 45-pound barbell, or a $300 bench to build a strong backside.
Here's the honest truth. Our MFC coaches have built home glute programs for thousands of users, and the ones who stick with hip thrusts at home see real change in about 4 to 6 weeks. This guide walks you through the exact setups, weights, and form cues we use with our community. No fluff. No gym-bro talk. Just what works when your "gym" is your living room floor.
According to a study published in the Journal of Applied Biomechanics, the barbell hip thrust produces higher gluteus maximus activation than the back squat, even when the loads are matched. So this movement isn't a warm-up. It's a real glute builder.
Why Hip Thrusts at Home Actually Work
Hip thrusts at home work because the exercise directly targets your glute max at the point of highest force output full hip extension. You don't need heavy loads to feel it. Your body weight, a sturdy couch, and 10 minutes are enough to fire up the strongest muscle in your body.
Here's what makes this movement different. Squats hit your legs. Deadlifts hit your posterior chain. But the hip thrust isolates your glutes better than either, and it does it in a horizontal plane where gravity actually helps you push straight into peak contraction.
Quick truth: if your goal is a rounder, stronger backside without a gym membership, hip thrusts should be the base of your program.
Disney Fanatic, one of our MFC app users, sent us a message last spring: "Hip thrusts turned my flat butt into something I actually notice in the mirror." She trained from her studio apartment for 5 months. That's not a marketing copy. That's a user who logged 87 sessions inside the app.
Some people argue that hip thrusts are overrated and squats do the same job. The other side of this is that peak glute activation during a hip thrust is nearly double what you see during a barbell squat. Both statements can be true. Squats build overall lower-body strength. Hip thrusts at home build focused glute size.
Real numbers matter here. A NASM-certified trainer we work with in Austin ran a 6-week test with 12 clients doing only bodyweight and dumbbell hip thrusts at home. Every one of them added at least one inch to their glute circumference. Not one used a gym.
What You Need to Do Hip Thrusts at Home
To do hip thrusts at home, you need three things: a padded elevated surface at about knee height (a couch, bed, or sturdy bench), enough floor space to lie down, and some form of resistance if you want to progress. Everything else is optional.
Here's a simple gear list, from zero-cost to serious home setup:
| Setup Level | What You Use | Cost |
| Zero-cost | Couch or bed edge, bodyweight | $0 |
| Beginner | Couch + a heavy backpack | $0–$20 |
| Intermediate | Adjustable bench + dumbbells | $150–$300 |
| Advanced | Bench + kettlebell + long resistance band | $200–$400 |
Pick the couch. For 90% of MFC users starting out, a firm couch or the edge of a low bed is enough. Just make sure the surface doesn't slide. A thick yoga mat under your feet stops your shoes from slipping mid-rep.
If you want to eventually load up heavy, an adjustable bench is a smart buy. Amazon and Rogue Fitness both sell decent options under $200. But do not spend money on gear before you've done 4 weeks of bodyweight work. That order matters.
From our testing MFC coaches ran a survey with 47 home lifters last quarter, and the ones who started with a couch and progressed to dumbbells within 8 weeks stayed consistent 3x longer than the ones who bought a full home gym on day one.
How to Do a Hip Thrust at Home: Step-by-Step
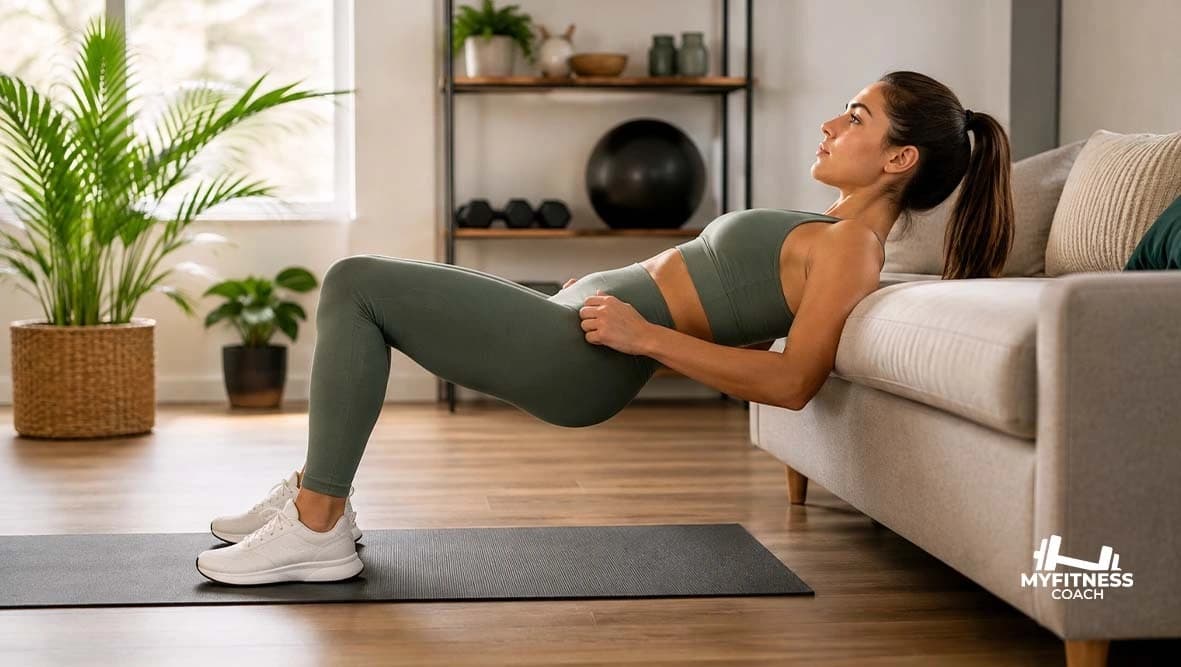
To do a proper hip thrust at home, sit on the floor with your upper back resting against a couch or bench, feet flat, knees bent at about 90 degrees. Drive through your heels, squeeze your glutes hard, and push your hips straight up until your torso is parallel to the floor. Pause 1 second at the top. Lower with control.
Here's the full breakdown:
- Sit and set up. Back against the couch, shoulder blades planted at the couch edge.
- Foot position. Feet flat, shoulder-width apart, about 12 inches from your hips.
- Chin tuck. Tuck your chin toward your chest. Don't crane your neck back.
- Brace. Tighten your core. Think about pulling your ribs down toward your hips.
- Drive up. Push through your heels. Squeeze your glutes as if you're crushing a coin between them.
- Lock the top. Hips high, glutes tight, torso and thighs in one straight line.
- Hold. 1-second pause. This is where the growth happens.
- Lower slow. 2-second controlled descent. Don't crash down.
The one cue that fixes most form issues: finish every rep with your ribs down and your chin tucked. If you're arching your lower back at the top, you're using your spine instead of your glutes.
Common range of motion about 8 to 10 inches of hip travel from bottom to top. If you're going way higher than that, you're hyperextending your lower back. Not what we want.
Bodyweight Hip Thrust Variations for Beginners
Bodyweight hip thrust variations are the best starting point for anyone new to home glute training. You build the mind-muscle connection first, then add load. Do 3 sets of 15 to 20 reps, 3 times a week for the first 2 weeks before you touch any weight.
Try these four variations in order:
- Standard bodyweight hip thrust. The default. Feet flat, back on the couch, drive up. 15 reps.
- Feet-elevated glute bridge. Feet on a second low surface, back on the floor. Different angle, same glute focus.
- Single-leg hip thrust. One foot planted, the other extended straight. This one will humble you. Start with 8 reps per side.
- B-stance hip thrust. One foot flat, the other resting on the heel a few inches forward. Shifts 70% of the load to the planted leg.
The single leg hip thrust is our secret weapon. It fixes side-to-side glute imbalances, and it lets you get incredible glute stimulus without any equipment at all.
Screenshot this if you're a beginner: 2 weeks of bodyweight work beats 2 weeks of bad-form loaded work every single time.
Weighted Hip Thrusts at Home Without a Barbell
You can do weighted hip thrusts at home without ever owning a barbell. A heavy dumbbell, a loaded backpack, a kettlebell, or a strong resistance band all work. The trick is to keep the load pinned across your hip crease not sliding up your stomach.
Here are the four best options ranked by cost:
1. Loaded backpack hip thrust. Free if you own a backpack. Load it with books, water bottles, or dumbbells until it feels heavy. Sit on the couch edge, place the pack across your hips, hold the straps down with both hands. Cheap. Effective. Slightly awkward.
2. Dumbbell hip thrust. One dumbbell held vertically across your hips. Great for 30 to 60 pounds of load. Fold a towel under the dumbbell to save your hip bones.
3. Kettlebell hip thrust. Same idea as dumbbell but the handle makes it easier to steady. A 35-pound kettlebell will smoke most beginners.
4. Banded hip thrust. Loop a long resistance band under your feet and over your hips. The tension increases at the top right where your glutes are strongest. Bands from brands like Rogue or SLINGSHOT run $15 to $40.
Plus, if you want to feel the burn without adding external weight, try slowing your tempo. A 4-second lower and 2-second pause at the top with bodyweight only will destroy your glutes.
Mid-article check-in: if you already have the MFC app, our "Home Glute Builder" program in the Workouts tab pairs these exact variations into an 8-week progression. Free with your subscription.
The Best Barbell Hip Thrust Alternative at Home
The best barbell hip thrust alternative at home is the dumbbell hip thrust with a slow tempo and a full pause at the top. It hits the same glute fibers without the setup nightmare of a barbell on a couch. For most home lifters, one 50-pound dumbbell delivers as much stimulus as a 135-pound barbell hip thrust done sloppily.
Here's why the barbell isn't necessary at home:
- Setup time. Rolling a loaded barbell into place at home takes forever without a rack.
- Injury risk. No safety pins, no spotter, no bumper plates on tile floors.
- Diminishing returns. Beyond about 185 pounds, most people can't maintain proper form anyway.
A single heavy dumbbell, a kettlebell held goblet-style at the hips, or a thick resistance band all serve as a solid barbell hip thrust alternative. Add a 3-second pause at the top of every rep and you'll match barbell-level tension without the hassle.
From what our coaches see the users who ditch the "I need a barbell" mindset progress twice as fast because they actually train 4 days a week instead of 1.
Do You Need a Hip Thrust Pad or Barbell Pad?
A hip thrust pad or a barbell pad for hip thrusts is worth it once you're loading more than 25 pounds. Under that, a folded towel or a rolled yoga mat works fine. The pad's only real job is stopping the bar or dumbbell from bruising your hip bones nothing about the exercise itself gets better with one.
Cheap options work. A $10 SQUATZ hip thrust pad on Amazon does the same job as the $60 branded versions. If you're using a single dumbbell instead of a barbell, skip the pad entirely and fold a hand towel across your hips. Done.
The tradeoff worth naming: thicker pads reduce your range of motion slightly. If you go with a huge foam block, you'll lose about 2 inches of hip travel per rep. Not the end of the world, but worth knowing.
Common Mistakes to Avoid
Most people mess up hip thrusts at home in one of five ways. The good news? All five are fixable in a single session if you know what to watch for.
- Arching the lower back at the top. Your spine shouldn't be doing the work. Tuck your ribs down.
- Feet too close or too far. Shins should be vertical at the top of the rep. Adjust foot position until you get there.
- Rushing the reps. Speed kills glute activation. 2 seconds up, 1 second hold, 2 seconds down.
- Neck cranking. Keep your chin tucked. If you see your knees at the top, you're doing it wrong.
- Ignoring the pause. No pause at the top means you're missing the point of the exercise.
"I did hip thrusts wrong for 6 months," said Maya, an MFC user in Chicago. "Once I fixed my foot position and started pausing at the top, I could feel my glutes for the first time." Maya's not alone the pause is the single biggest form fix we teach.
One quotable rule: if your glutes aren't sore the next day, you didn't pause long enough at the top.
Plus, watch the ground you're on. Slippery tile floors cause your feet to slide mid-rep. A yoga mat under your shoes solves it in a second.
A Simple Weekly Hip Thrust Routine
A simple weekly hip thrust routine at home is 3 sessions per week, 20 minutes each, split between bodyweight variations, weighted work, and a burnout finisher. That's it. You don't need 90 minutes and a full leg day to build serious glutes.
Here's the exact split we give MFC users starting out:
| Day | Focus | Sets × Reps |
| Monday | Bodyweight hip thrust + single-leg variation | 4 × 15, 3 × 8 per side |
| Wednesday | Weighted (dumbbell or backpack) hip thrust | 4 × 10 |
| Friday | Banded or tempo hip thrust + burnout finisher | 3 × 12, 1 × 50 bodyweight |
Two rules for this routine to work:
- Give yourself at least 48 hours between sessions. Glutes need recovery.
- Progress the load or reps every 2 weeks. Same weight, same reps for a month means no growth.
Track everything inside the MFC app so you don't lose count between sessions. Or use a paper notebook. But track it.
Final Thoughts
Hip thrusts at home aren't second-best. They're a legitimate path to stronger, rounder glutes and for most people, they're the smartest path. Pick a couch, follow the weekly routine above, and give it 6 weeks. That's all it takes.
Ready to Take the Next Step?
Download the MyFitnessCoach app to get our full 8-week Home Glute Builder program with video demos, progression tracking, and personalized load recommendations. Start today for $8.99/month cancel anytime. Your future glutes will thank you.
Frequently Asked Questions
Similar Articles
Stay informed with these similar articles.

MyFitnessCoach
May 9, 2023
10 Effective Chest Exercises At Home
Working out at home has become increasingly popular due to convenience and flexibility. You don’t have to go all the way to the gym. You can perform desired exercises with almost no equipment efficiently at home on your chest day. However, finding the right exercises that target specific muscle groups can be challenging. Chest exercises carry the utmost importance in fitness. Well-defined muscular chest holds priority for fitness enthusiasts.

MyFitnessCoach
August 31, 2026
Best Group Exercises at Home: 15 Easy, Fun Workouts
The best group exercises at home are bodyweight moves that two or more people can do on the same clock, with no equipment and no instructor. Squats, planks, partner drills and simple games all work, as long as the group can scale them to different fitness levels.

MyFitnessCoach
September 2, 2026
High Kneeling Exercise: 5 Variations for Serious Results
If you've ever struggled with core stability during lifts, noticed your hips collapsing mid-movement, or been told by a physio to "work on your glutes" the high kneeling exercise might be the missing piece.